
Corner Banquette Makeover + How to Redirect Air Vents Under Cabinets
[ad_1]

All of the aspects to give a corner banquette a new glance with paint, additionally how to install an air vent redirect less than a cupboard.
At last!
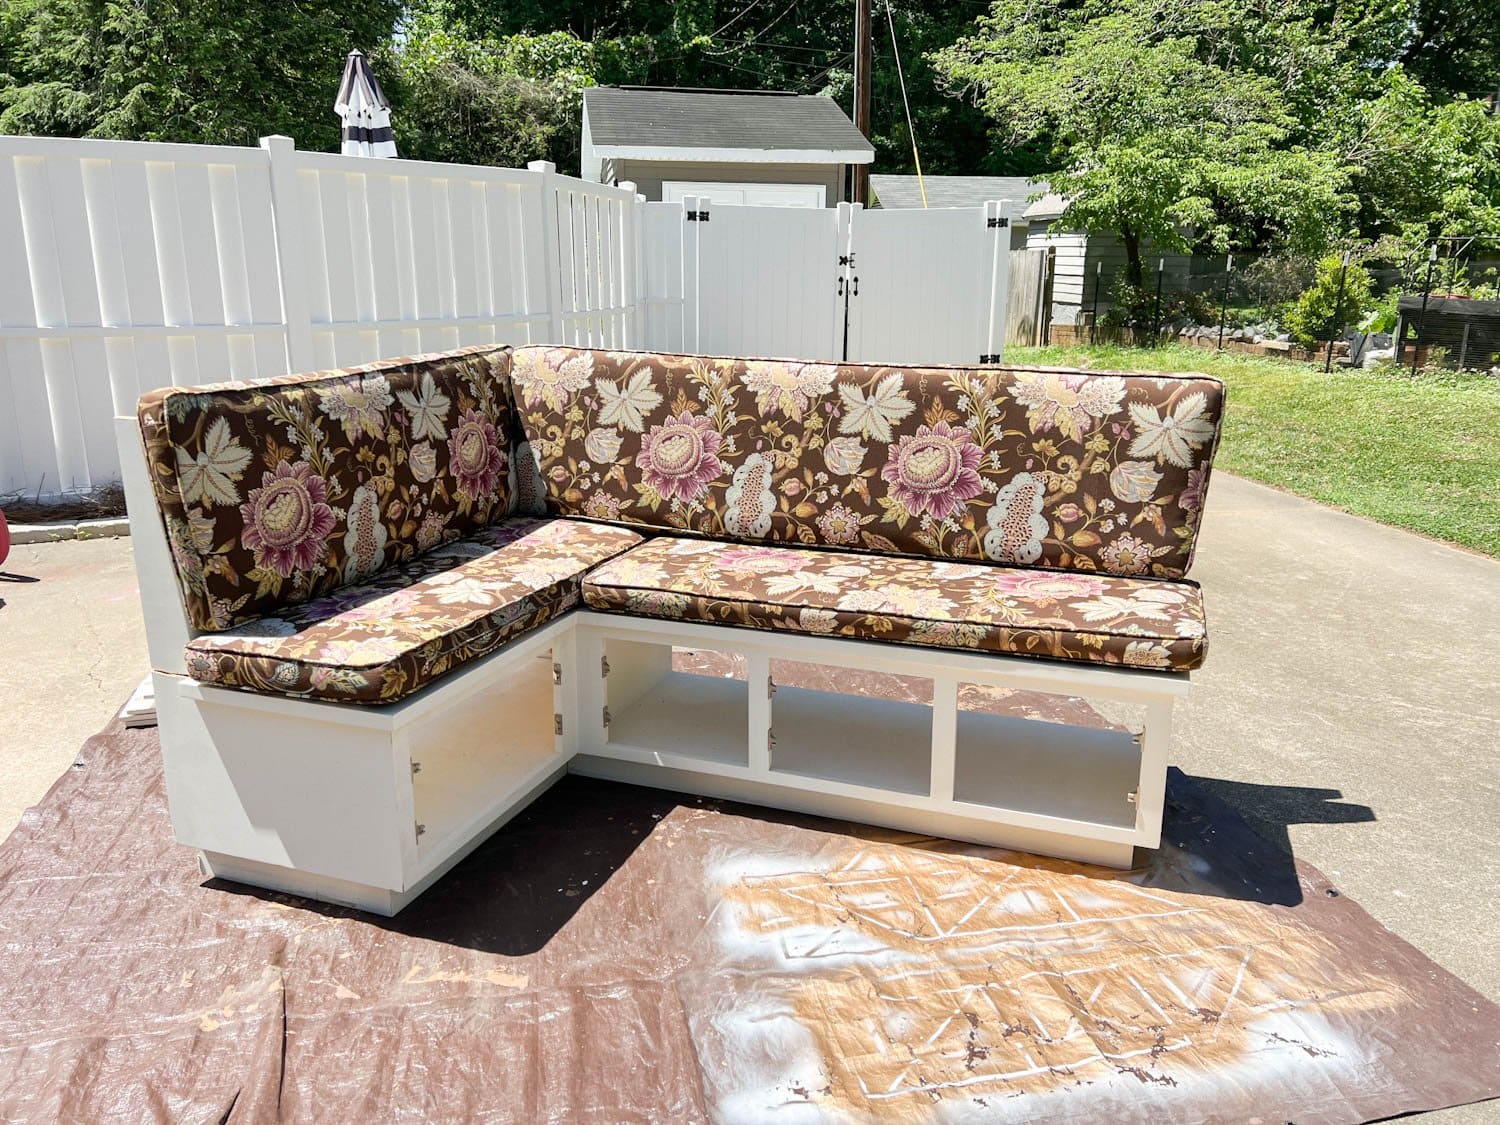
Immediately after months of searching for a secondhand corner banquette on Fb Marketplace, driving just about 4 several hours spherical-trip to decide on it up, shifting a doorway, installing LVP flooring, redirecting an air vent, and painting for days, we have the slight makings of breakfast nook!

I managed to shoot the banquette’s new digs ideal following the electrician still left from setting up those people sconce containers and relocating for the linear chandelier, so forgive the dust. 😉
I’m nevertheless waiting on reupholstered cushions, but even “naked” this banquette currently has us envisioning so numerous enjoyable household dinners collected all-around the desk with lots of more liked kinds squeezed into this small place!
How to Redirect Air Vents Less than Cabinets
Just one minor impediment we experienced to address in advance of creating the shabby corner banquette seem stylish was rerouting the air vent on the floor that was positioned proper beneath the less than seat the cupboards.
(There normally has to be at the very least a single obstacle or it would not be a house improvement challenge, would it? Murphy’s Legislation each and every time.)
If you’re at any time building created-in shelves, cupboards, a window seat, or a corner banquette like ours, you unquestionably can not go over and disregard any vents the air flow should be redirected to keep the space appropriately heating and cooling.


How to Put in an Air Vent Redirect
We utilized this air vent redirecting package referred to as a Toe Ductor (it operates for wall registers and baseboard registers much too).
The package makes it possible for you to press the air move underneath your developed-in furnishings. (Not sponsored… just a cool thing we have found out and used for DIYs around the many years.) Make positive you let at the very least 4 inches of space underneath your cabinet or crafted-in.
We did the very same underneath the designed-in cupboards and window seat for our neighbors’ rec place makeover past year. In hindsight, I would paint that vent grate to mix it.

Supplies
- Toe Ductor Package (wall vent package right here or baseboard vent package in this article)
- Drill
- 1/2″ wooden screws
- Oscillating instrument
- Duct tape

Move 1 – Connect Box to Floor Vent
Include the ground vent first with the Toe Ductor box and screw into spot.

Move 2 – Evaluate and Reduce for the Toe Kick Cover
Come to a decision the place you want to position the new air vent on your built-in, measure, and mark. Utilizing the oscillating resource, slice out a rectangular portion.


Step 3 – Attach the New Vent
On the backside of the rectangular gap you just slice, connect the new vent with screws to the toe kick.

Move 4 – Attach Flexible Duct
Use the delivered metallic strip to connect the flexible duct to the back again of the vent. (Our steel strip place up a bit of a fight, so we strengthened it with duct tape.)

Phase 5 – Attach Flex Duct to Box and Place Cupboard/Constructed-In on Best
Extend out the flexible duct underneath the corner banquette created-in, and connect it to the box on the flooring with the kit’s steel stripping. We reinforced ours again with duct tape so no air escapes.
Position the cupboard or designed=in on leading of the box and anchor to the wall as you’d like. You can attach the toe kick grate to the entrance soon after portray.
Move 6 – Prep and Paint
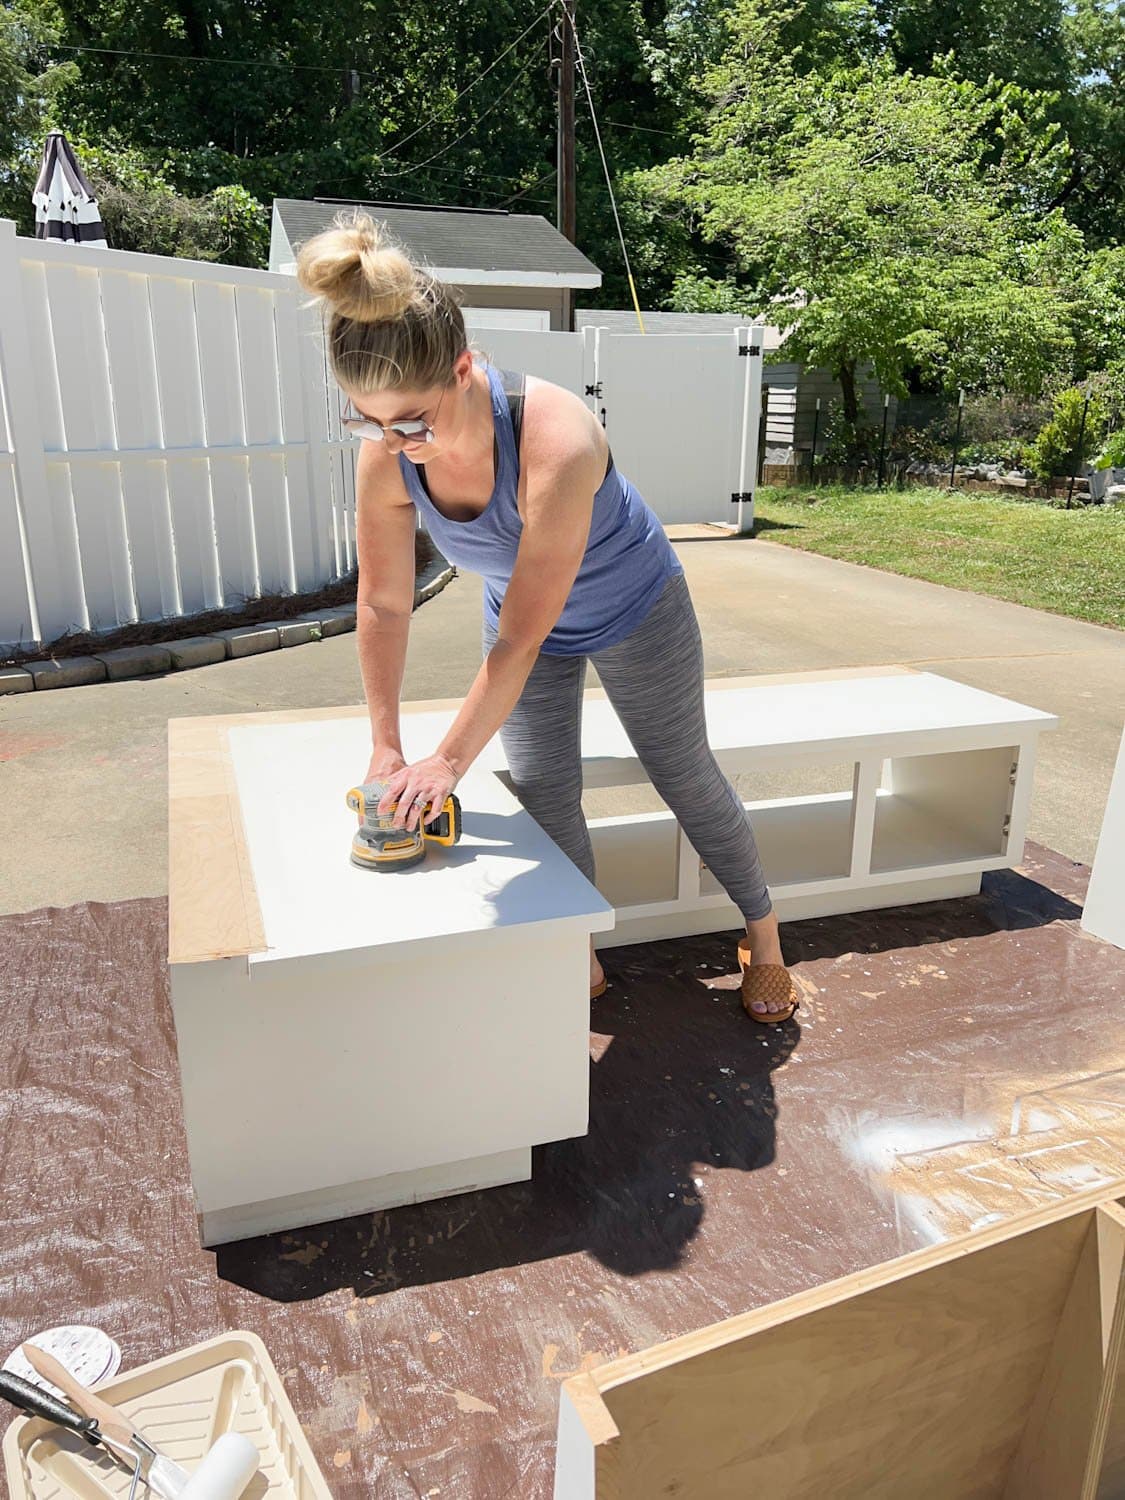
I went via my typical cupboard painting course of action since this corner banquette is very considerably like a piece of cabinetry.
- Sand with an orbital sander utilizing medium/great grit
- Vacuum and tack cloth away dust
- Apply liquid sander deglosser
- Prime with shellac primarily based primer
- Paint with enamel satin

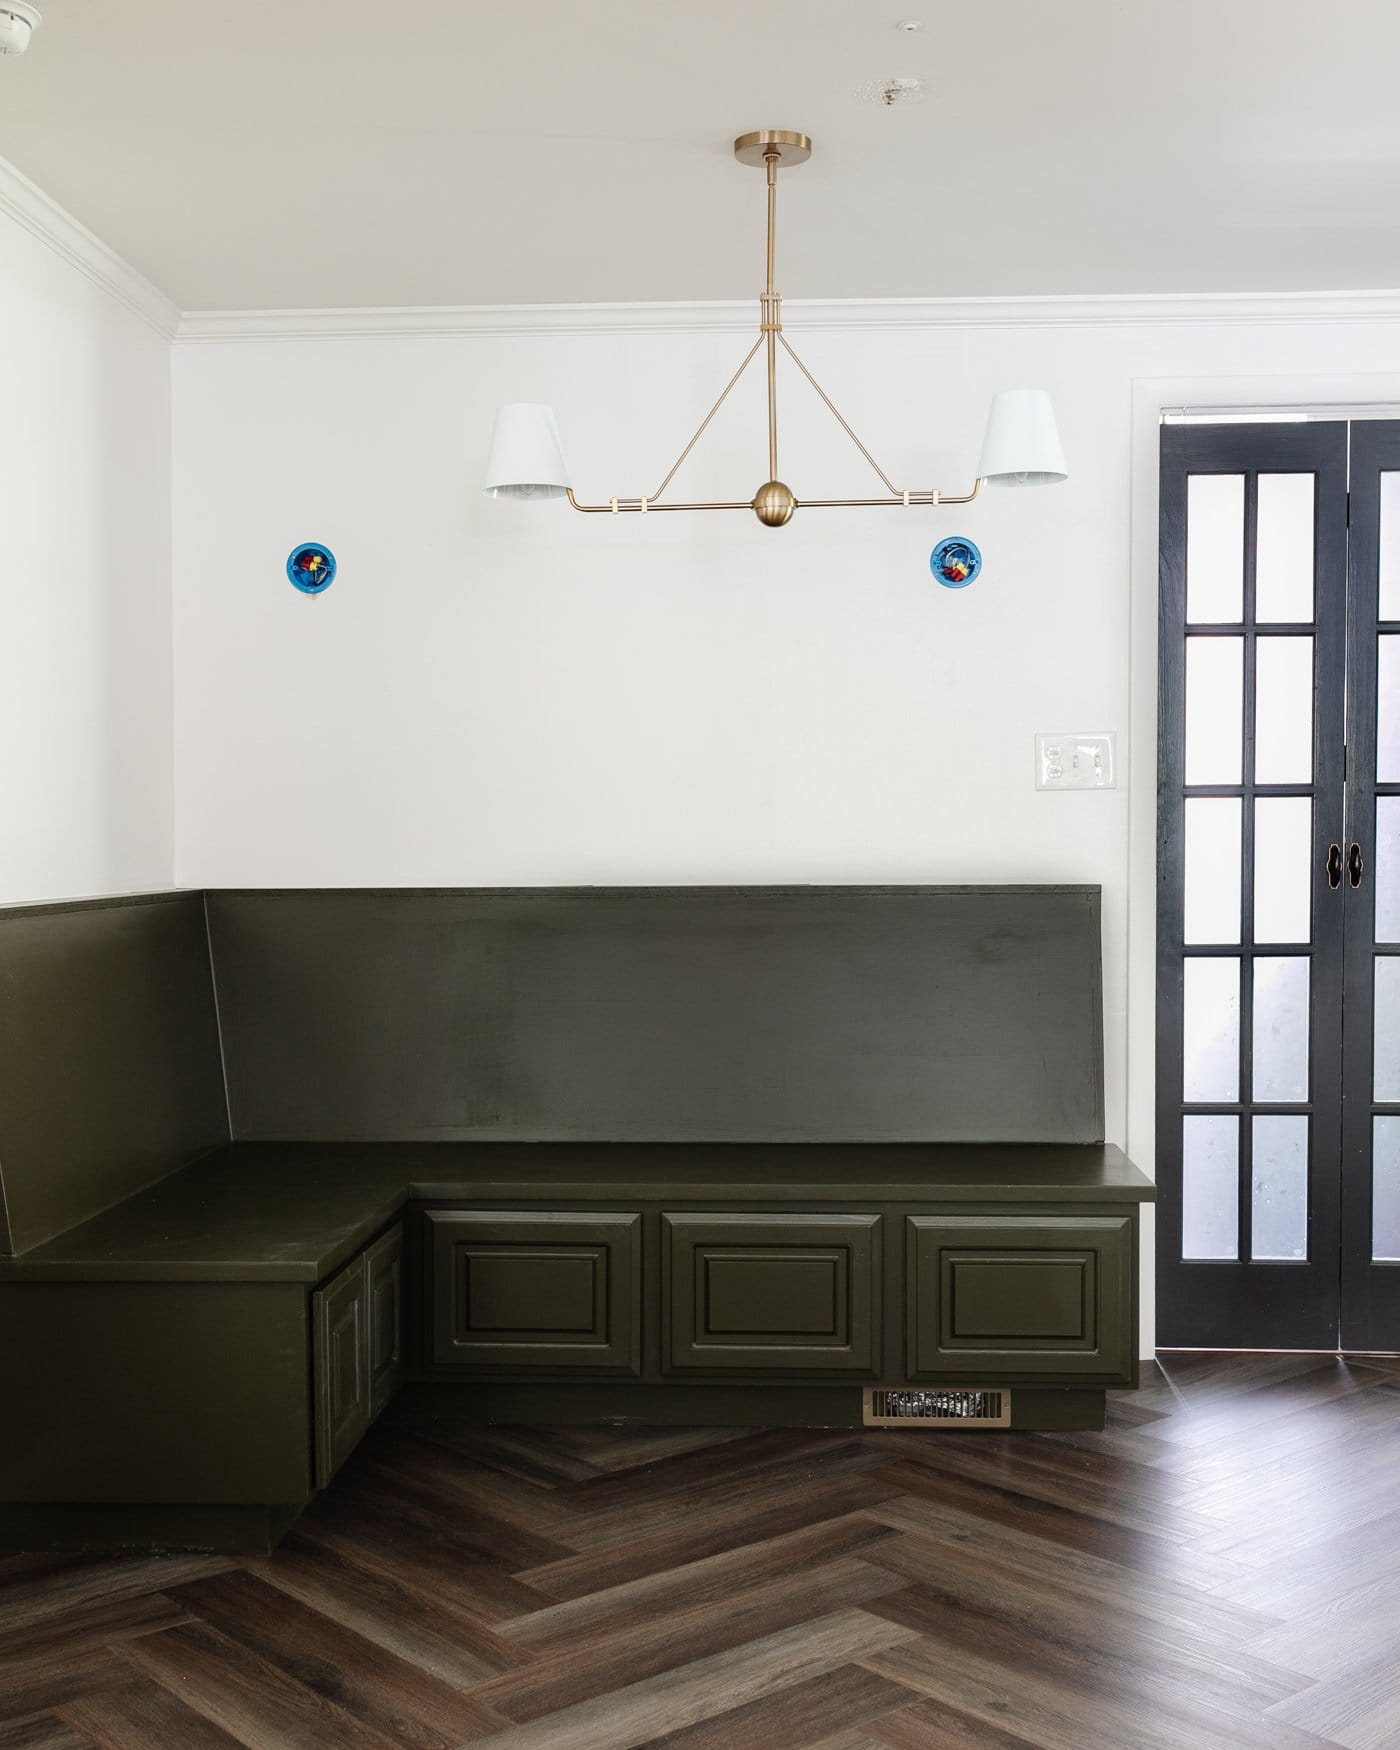
Test out that deep, desaturated olive inexperienced! It blends perfectly with our additional lively hunter inexperienced kitchen area cupboards even though continue to emotion like a neutral. Really like! The colour is Benjamin Moore Southern Vines.
We anchored the new-to-us corner banquette to the wall whilst we have been at it so the young ones can get rough and rowdy on this bench all they want.


The Painted Corner Banquette
I are not able to wait around to see some quite striped cushions on this bench shortly, but it appears to be so good previously!
This linear chandelier is best for the slim rectangular eating table that will go here before long. Mainly because this place is windowless, and this corner feels so dim, we additional sconce boxes to give it some added help.

I plan to go back again and paint the vent address the exact same Benjamin Moore Southern Vines to blend with the rest of the corner banquette so it will pretty much vanish.
Are you starting off to see the eyesight choose shape in this tiny eating nook? Are we feelin’ the bench seating circumstance? We have an affordable wall procedure prepared future to include some more dimension that I can not wait to present you!
A lot more Household furniture Concepts

[ad_2]
Resource link


